Useful tips
- Make sure there is no wax in your ears
- Keep the hearing aid away from hair dye / hair spray / water
- Service the hearing aid every 6 months
All NHS hearing aids are able to have the Telecoil (loop/T) system set up as an additional programme. It may not be set up on all hearing aids. The Telecoil system works by the input signal been converted to an electro magnetic signal which is then picked up by the Telecoil receiver inside the hearing aid.
The Telecoil system will only work if a loop system is installed. Telecoil systems are generally installed in: – Banks, Building Societies, Post Offices, Theatres, Churches and many more public buildings, they are normally identified by the Telecoil logo. Telecoil systems can also be installed into the patient’s home for use with the television; this can be done by the patient’s local sensory team.

To access the Telecoil programme on the hearing aid, please first identify the model of hearing aid:
- Analogue Hearing Aids – Switch the hearing aid to the “T” position.
- Oticon Spirit 2 – Switch the hearing aid to the “T” position.
- Oticon Spirit 2 Power, 3 Direct, 3 Direct with Volume Control, Spirit 3 Power – Press the button located on the back of the hearing aid, you will then hear 2 beeps, this is to inform you that you are now on the Telecoil system, press the button again and you will be back to the general microphone program.
- Oticon Spirit 3 Super Power – Refer to your user manual to see which program, either 1,2 or 3 is set to the Telecoil system, then switch the aid to this position.
- Oticon Zest, Zest Power and Zest Communicate – Press the button located on the back of the hearing aid, you will then hear 2 beeps, this is to inform you that you are now on the Telecoil system, press the button again and you will be back to the general microphone program.
- Phonak Aids – Please refer to the user manual
This depends on the fault. There are some simple checks you can do:
- Make sure the tubing is not blocked
- Insert a new battery
- Make sure there is no water in the tubing
Please see also Common problems and solutions
If none of these help then please contact the department.
To adjust the tubing to the right length, place the mould in your ear and the hearing aid over your ear; ask somebody to mark the tubing just past the end of the hearing aid hook, then remove the mould and cut the tubing at this point.
OR
Use the piece of tubing as a guide: hold it against the mould mould and cut the new tubing to the same length.
 OR
OR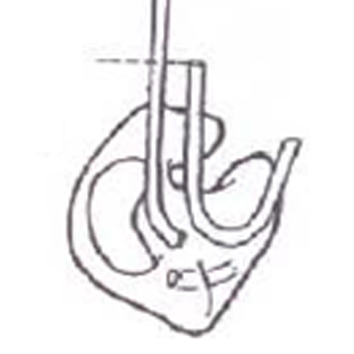
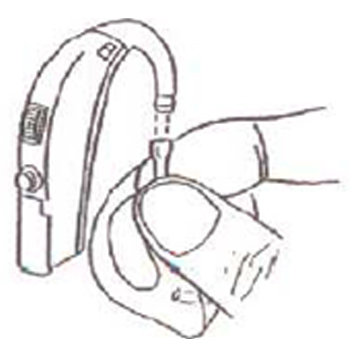
Squeeze the top of the tube and fit it over the end of the hearing aid hook.
- Place the hearing aid behind your ear.
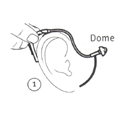
- Hold the bend of the tube between your finger and thumb.
The dome should point towards the ear canal opening.
Gently massage the dome into your ear canal until the tube sits flush against the skin on the side of your head.
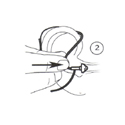
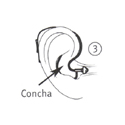
- Tuck the ear / tail back into the bowl of your ear. If any tube is sticking out it is not positioned correctly, repeat the above procedure.
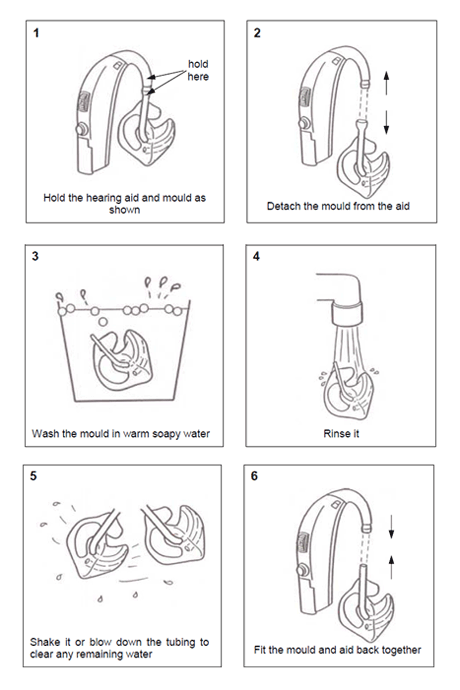
It is very important that the hearing aid is regularly cleaned. If this is not done the aid may malfunction, have reduced output or stop working. The following information describes the best method of cleaning:
- Hold the hearing aid and mould as shown
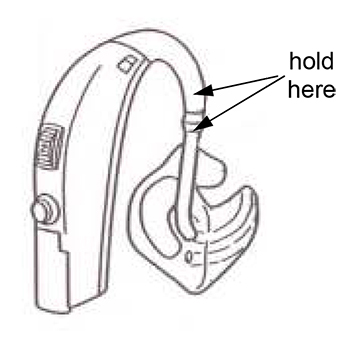
- Detach the mould from the aid
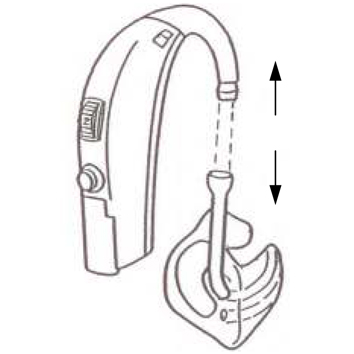
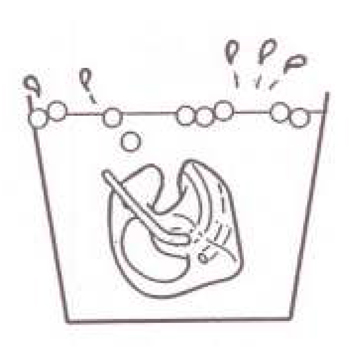
- Wash the mould in warm soapy water
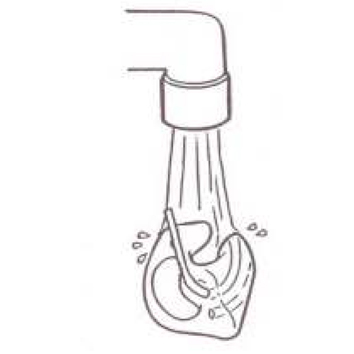
- Rinse it
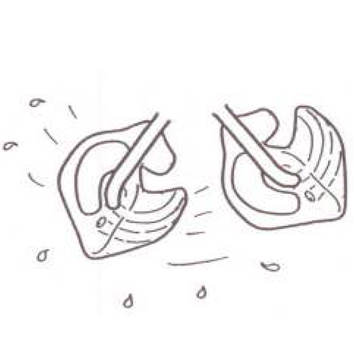
- Shake it or blow down the tubing to clear any remaining water
- Fit the mould and aid back together

Reproduced with kind permission of Southampton University Hospitals NHS Trust 2011
It is important that the ear mould is in your ear properly. Some people find it helpful to look in the mirror to do this.
- Hold the ear mould at the back with your finger and thumb.
Pull it back past your ear.
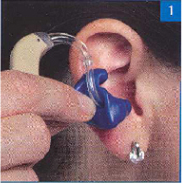
- Put the bit that goes down the ear canal in to position.
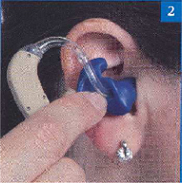
- Then get in place the bit that goes in to the crease at the top of your ear.
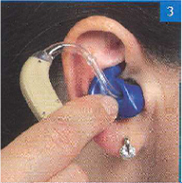
- Use your other hand to pull down your ear lobe. Push your ear mould firmly in.
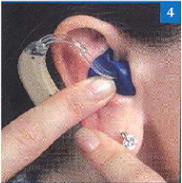
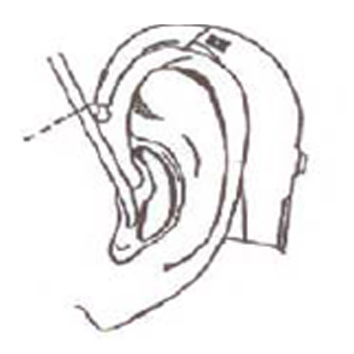
- Then put the hearing aid behind your ear. It should look like this when fitted correctly.
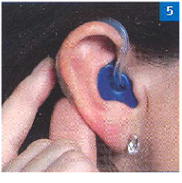
Your audiologist may have practised a slightly different method with you, but whatever the method, the important thing is to end up with the ear mould fitted as shown in picture 5.
Reproduced with kind permission from Southhampton University Hospital NHS Trust 2011
It is very important that the hearing aid is regularly cleaned. If this is not done the aid may malfunction, have reduced output or stop working. The following information describes the best method of cleaning:
- Disconnect the hearing aid and the ear piece (fig2)
- Clean the hearing aid (electronic part) with a dry tissue ensuring not to get it wet.
- It is very important to clean the earpiece in warm soapy water. For patients prone to infections a sterilising solution can be used. The earmould can be left to soak for around 30 minutes (fig3)
- Remove the earpiece from the solution and rinse with clean water (fig4).
- It is very important to dry the tube through by either blowing through the tube or shaking the earpiece (fig5). Failure to dry the tubing will give the effect that the hearing aid is not working; this is due to the sound path been blocked. You can also purchase an “Earmould Puffer” from Castle Hill Hospital which can be used for drying the tubing.
- Once this has been done connect the earpiece back to the hearing aid (fig6).
